
Can Water-Damaged Wood Flooring Be Salvaged?
Water damage is one of the biggest threats to hardwood flooring. It can lead to warping, staining, and even rotting if not addressed quickly. But can water-damaged wood flooring be salvaged during removal? The answer depends on the extent of the damage and the type of flooring. This guide will help you determine what’s possible and how to take action.
Step 1: Assess the Extent of the Damage
Start by inspecting your hardwood floor to understand the severity of the water damage:
- Minor Damage: Small stains or slight warping may still be salvageable.
- Moderate Damage: Boards that are cupped or buckled might be repairable but could need refinishing.
- Severe Damage: Flooring that is rotting, heavily warped, or swollen may need to be replaced.
Learn more about the causes of hardwood floor warping and how to address it here.
Step 2: Determine the Type of Flooring
The type of hardwood flooring you have plays a big role in whether it can be salvaged:
- Solid Hardwood: These planks are thicker and can often be sanded and refinished to remove water damage.
- Engineered Hardwood: With a thinner wood layer, engineered floors are less forgiving. Learn about the differences here.
- Reclaimed or Specialty Wood: These may require careful removal for reuse, especially if they’re rare or expensive.
Step 3: Act Quickly to Minimize Damage
The faster you address water damage, the better your chances of salvaging the flooring:
- Dry the Area: Use fans, dehumidifiers, and open windows to dry the wood thoroughly.
- Clean Up Water: Remove any standing water immediately using towels or a wet vacuum.
- Inspect for Mold: Look for signs of mold growth, especially if the water was left for an extended period.
Prevent future issues by understanding more about wood floor care here.
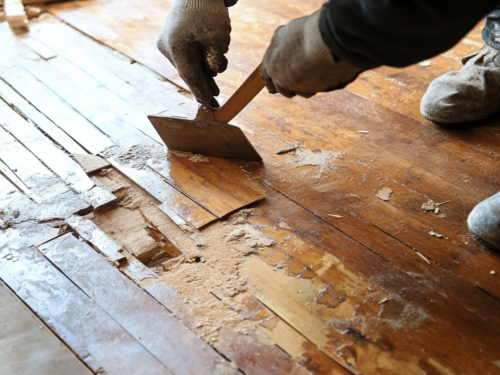
Step 4: Carefully Remove the Damaged Planks
If the damage is too severe to repair, you’ll need to remove the affected boards. Follow these steps:
- Gather Tools: You’ll need a pry bar, hammer, and a utility knife.
- Start at the Edge: Begin removing boards at the edges of the room to avoid unnecessary damage.
- Work Slowly: Take your time to avoid damaging surrounding planks or the subfloor.
Tip: If your flooring has wide planks, salvaging them may be easier. Learn more about plank sizes here.
Step 5: Decide What Can Be Reused
Once the boards are removed, inspect each one:
- Reusable Boards: Look for planks that are only lightly stained or warped. These can often be sanded and refinished.
- Non-Reusable Boards: Severely damaged, rotting, or moldy boards should be discarded.
- Matching New Boards: If you need to replace some boards, matching them to your existing floor is key. Find tips here.
Step 6: Reinstall or Replace
Once you’ve determined what’s salvageable, it’s time to reinstall or replace your flooring:
- Refinishing Salvaged Boards: Sand and refinish the planks to restore their appearance.
- Replacing Damaged Sections: Install new boards and finish them to match the existing floor.
- Full Replacement: If most of the floor is damaged, consider replacing the entire floor.
Choosing the right finish for your floors can make a big difference. Compare oil-based and water-based finishes here.
Step 7: Prevent Future Water Damage
To avoid dealing with water-damaged floors again, take these precautions:
- Use Rugs in Wet Areas: Place rugs near sinks, bathtubs, and entryways.
- Fix Leaks Quickly: Address plumbing issues immediately.
- Control Humidity: Use a dehumidifier in damp climates.
- Apply a Protective Finish: Regularly maintain your floor’s finish to provide an extra layer of protection.
Learn how to protect your floors from other environmental factors here.