

Can I Install Wood Flooring Myself, or Should I Hire a Professional?
Installing wood flooring is a great way to transform your home. But should you tackle it yourself, or is hiring a professional the better choice? This guide will help you weigh the pros and cons of each option so you can make the best decision for your project.
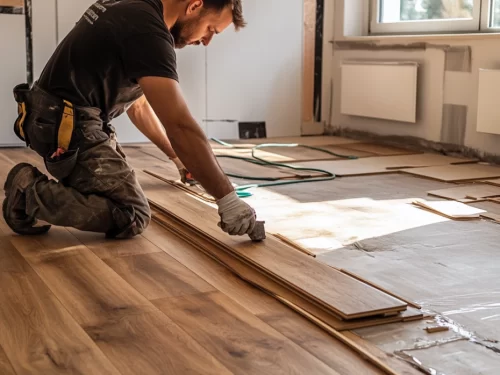
Step 1: Understand the Types of Wood Flooring
The type of wood flooring you choose can impact how easy or difficult it is to install. Here are the main options:
- Solid Hardwood: Durable but challenging to install. Requires nailing or stapling to a subfloor. Learn more about solid wood here.
- Engineered Hardwood: Easier for DIYers. Often comes with click-and-lock systems.
- Pre-Finished vs. Unfinished: Pre-finished boards are simpler to install because they don’t require sanding or sealing after installation.
Choosing the right material can make a big difference in the complexity of your project.
Step 2: Assess Your DIY Skills
Installing wood flooring requires specific skills and tools. Here’s what you’ll need to consider:
- Measuring and Cutting: Accurate measurements are crucial to avoid gaps or uneven edges.
- Subfloor Preparation: You’ll need to check for moisture, level the subfloor, and possibly add underlayment.
- Specialized Tools: Tools like a flooring nailer, saw, and tapping block are essential.
- Attention to Detail: DIY installations require patience and precision to achieve a professional look.
If you’re confident in your abilities, DIY may be a rewarding option. Otherwise, hiring a professional ensures a flawless finish.
Step 3: Consider the Costs
Budget is an important factor in deciding whether to DIY or hire a pro. Here’s a breakdown:
- DIY Costs:
- Materials: Flooring, underlayment, and adhesives.
- Tools: Renting or buying tools can add to the cost.
- Time: Factor in the value of your time.
- Professional Costs:
- Labor: Professionals charge per square foot but include expertise and efficiency.
- Fewer Mistakes: Saves money on potential errors and repairs.
If you’re on a tight budget, DIY might seem appealing. However, mistakes can become costly. Learn how to prevent issues like warping here.
Step 4: Evaluate the Room’s Challenges
Some spaces are easier to work with than others. Consider these factors:
- Room Shape: Large, square rooms are simpler than irregular spaces with many corners.
- Moisture Levels: Rooms like kitchens and bathrooms may require extra preparation to prevent water damage. Learn more here.
- Existing Flooring: Removing old flooring can add complexity.
Step 5: Time and Effort
Installing wood flooring is a time-intensive process. Ask yourself:
- Do You Have Time? A DIY project can take several days or even weeks, depending on the size of the room and your experience.
- Are You Prepared for Surprises? Unexpected challenges, like uneven subfloors or damaged planks, can extend your timeline.
Professionals work faster and handle surprises efficiently. If time is a concern, hiring a pro might be the better option.
Step 6: Protect Your Investment
Wood flooring is a significant investment. Protect it by ensuring proper installation:
- Professional Installation: Guarantees the job is done right the first time.
- DIY Precautions: If you go the DIY route, follow manufacturer instructions carefully to avoid voiding warranties.
- Sunlight Protection: Prevent fading with UV-resistant coatings. Learn more here.
Step 7: Mixing DIY and Professional Help
If you’re on the fence, consider a hybrid approach:
- DIY Preparation: Remove old flooring and prep the subfloor yourself to save money.
- Professional Installation: Hire an expert for the more complex tasks, like laying and finishing the wood.
This option gives you the best of both worlds: cost savings and professional quality.
Step 8: Decide Based on Long-Term Maintenance
Proper installation ensures your flooring lasts for years. Poorly installed floors can lead to gaps, warping, and other issues. Learn about fixing gaps here.